[React Native] 開始第一個 Hello World 專案
自己真的是買了書就不看書的那種類型,
前端三大王者之 React 跨多螢實戰入門 這本書買了超級久,
最近才又開始翻起來,那就來開始建置 React Native 的開發環境吧~
(謎之音:到底是要拖多久才能開始學習一個新東西?)
1. 準備 Android 和 iOS 開發環境
這個部分因為之前有用 Cordova 的關係,
Android Studio 和 Xcode 的環境都已經存在,
所以就不需要再安裝什麼了 (撒花~)
2. 安裝 React Native CLI
React Native 開發時,可以使用 Expo CLI 或 React Native CLI,
不過 Expo CLI 產出的 App 要跑在 Expo App 上面,
比較不像是最終 App 成品的模樣,
因此還是直接使用 React Native CLI 吧~
在 Mac 上,要先用 Homebrew 安裝好 Node.js 和 watchman。
我的 Node.js 本來就已經存在 (Cordova 也需要使用),
因此只需要再多裝 watchman:
brew install node
brew install watchman
接著,執行 npx react-native init AwesomeProject,
就會在目前目錄下,建立一個名為 AwesomeProject 的專案,
同時也會把 React Native CLI 安裝好:
testuser@localhost ~/ReactNative $ npx react-native init AwesomeProject

Need to install the following packages:
  react-native
Ok to proceed? (y) y

npm WARN deprecated urix@0.1.0: Please see https://github.com/lydell/urix#deprecated
npm WARN deprecated resolve-url@0.2.1: https://github.com/lydell/resolve-url#deprecated
npm WARN deprecated fsevents@1.2.13: fsevents 1 will break on node v14+ and could be using insecure binaries. Upgrade to fsevents 2.
npm WARN deprecated @hapi/topo@3.1.6: This version has been deprecated and is no longer supported or maintained
npm WARN deprecated @hapi/bourne@1.3.2: This version has been deprecated and is no longer supported or maintained
npm WARN deprecated @hapi/address@2.1.4: Moved to 'npm install @sideway/address'
npm WARN deprecated @hapi/hoek@8.5.1: This version has been deprecated and is no longer supported or maintained
npm WARN deprecated @hapi/joi@15.1.1: Switch to 'npm install joi'
npm WARN deprecated core-js@2.6.12: core-js@<3 is no longer maintained and not recommended for usage due to the number of issues. Please, upgrade your dependencies to the actual version of core-js@3.

               ######                ######
             ###     ####        ####     ###
            ##          ###    ###          ##
            ##             ####             ##
            ##             ####             ##
            ##           ##    ##           ##
            ##         ###      ###         ##
             ##  ########################  ##
          ######    ###            ###    ######
      ###     ##    ##              ##    ##     ###
   ###         ## ###      ####      ### ##         ###
  ##           ####      ########      ####           ##
 ##             ###     ##########     ###             ##
  ##           ####      ########      ####           ##
   ###         ## ###      ####      ### ##         ###
      ###     ##    ##              ##    ##     ###
          ######    ###            ###    ######
             ##  ########################  ##
            ##         ###      ###         ##
            ##           ##    ##           ##
            ##             ####             ##
            ##             ####             ##
            ##          ###    ###          ##
             ###     ####        ####     ###
               ######                ######


                  Welcome to React Native!
                 Learn once, write anywhere

✔ Downloading template
✔ Copying template
✔ Processing template
ℹ Installing dependencies
? CocoaPods (https://cocoapods.org/) is not installed. CocoaPods is necessary for the iOS project to run correctly. Do you want to install it? Yes, with Homeb
rew
✔ Installing CocoaPods
✔ Installing CocoaPods dependencies (this may take a few minutes)

  Run instructions for iOS:
    • cd "/Users/testuser/ReactNative/AwesomeProject" && npx react-native run-ios
    - or -
    • Open AwesomeProject/ios/AwesomeProject.xcworkspace in Xcode or run "xed -b ios"
    • Hit the Run button

  Run instructions for Android:
    • Have an Android emulator running (quickest way to get started), or a device connected.
    • cd "/Users/testuser/ReactNative/AwesomeProject" && npx react-native run-android

  Run instructions for Windows and macOS:
    • See https://aka.ms/ReactNative for the latest up-to-date instructions.
中間會需要 CocoaPods 這個套件,
可以自己選擇要用 Ruby gems 還是 Homebrew 安裝,
我選了 Homebrew,它就自動全部安裝好囉~
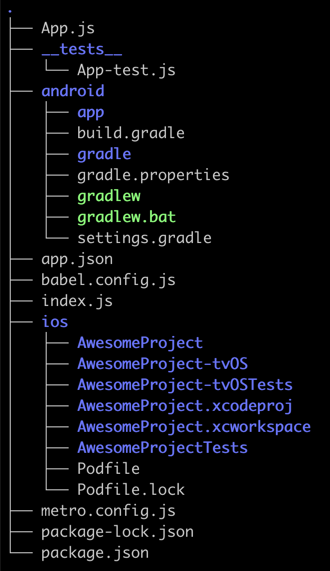
安裝後的目錄架構如下 (省略了 node_modules 和 ios/Pods 目錄):
3. 執行範例專案
執行 npx react-native run-ios 來執行專案:
testuser@localhost ~/ReactNative/AwesomeProject $ npx react-native run-ios

info Found Xcode workspace "AwesomeProject.xcworkspace"
info Launching iPhone 11 (iOS 14.3)
info Building (using "xcodebuild -workspace AwesomeProject.xcworkspace -configuration Debug -scheme AwesomeProject -destination id=65A7FB47-3797-4A56-9786-4E4725F34CCE")
success Successfully built the app
info Installing "/Users/testuser/Library/Developer/Xcode/DerivedData/AwesomeProject-akobrayahlxgwsdnrcpyavuculef/Build/Products/Debug-iphonesimulator/AwesomeProject.app"
info Launching "org.reactjs.native.example.AwesomeProject"
success Successfully launched the app on the simulator
這會開啟一個終端機視窗,
在這視窗裡按 r 的話,會重新整理 App;
按 d 的話,會開啟開發者工具選單 (不過我按了沒用):
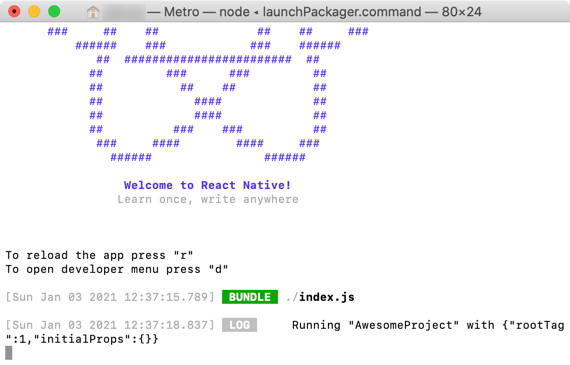
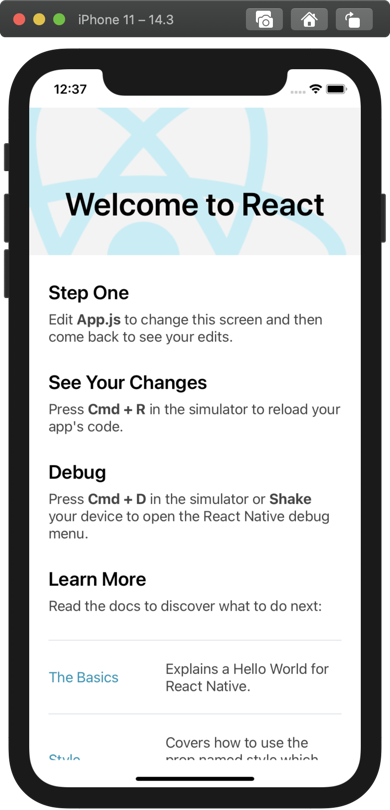
另一個開出來的就是 iOS 的模擬器視窗,
這裡可以看到我們的範例 App 已經跑起來了,
在這邊按 Cmd-R 也可以重新整理:
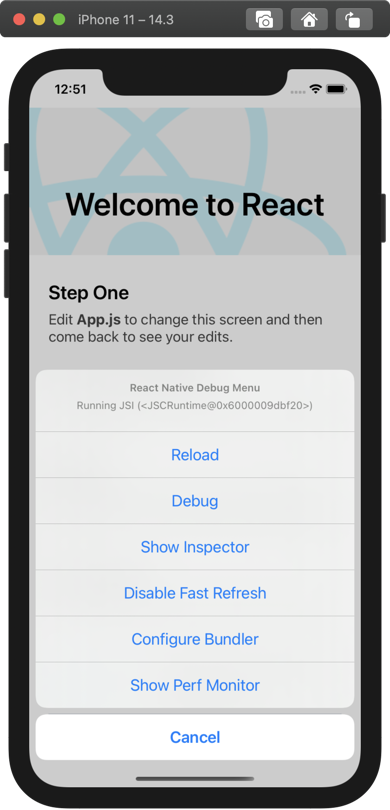
Cmd-D 可以開啟開發者工具 (這邊按有效),
不過如果失效的話,我得在終端機那邊按 r 重整,
再回到模擬器視窗按 Cmd-D 才能再叫出來,不知道是不是 bug:
先不管這個範例在做什麼 (← 很隨便),
總之第一個 Hello World 程式已經跑起來了,
接下來總算可以開始入門寫程式啦~