[GCloud] 使用 gcloud 連線到 Google Cloud Platform 上的 VM
雖然把 WordPress 網站架在 Google Cloud Platform (GCP) 上了,
但其實對 GCP 這個平台還是相當的陌生…
有時候需要進去 WordPress 機器裡執行一些指令操作,
都只能從 Google Cloud 網頁上,選擇 SSH 的功能:
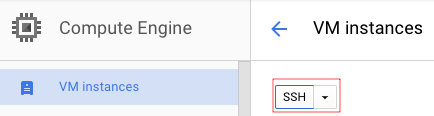
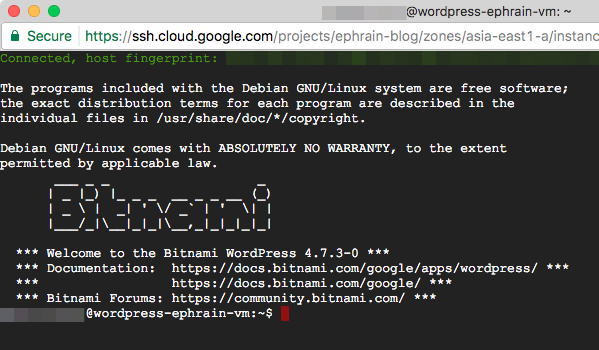
這會開啟一個瀏覽器的視窗,裡面就是 SSH 連到 VM 後的畫面,
操作起來和一般的 SSH 沒什麼不同,
不過畢竟不是自己執行的 SSH,
所以也不曉得要怎麼利用它傳檔案到 VM 上去:
今天稍微瞄了一下文件,把 Google Cloud SDK 裝起來了,
之後就可以直接用 gcloud 指令 SSH 到 VM 上,快速許多~
1. 安裝 Google Cloud SDK
參考文件 Google Cloud Platform > Cloud SDK > Quickstart for Mac OS X,
因為我是 Mac 的機器,因此抓下面的檔案:
google-cloud-sdk-156.0.0-darwin-x86_64.tar.gz
抓下來之後,解開放到一個固定的位置。
最好不要直接放在 ~/Downloads 目錄,因為 gcloud 會在解開的目錄裡,
把 gcloud 留在像 ~/Downloads 這種暫存用的目錄感覺怪怪的,
可能不小心在清除 ~/Downloads 目錄時,就不小心把 gcloud 砍掉了~
像我是將解開後的 google-cloud-sdk 目錄,放到 Dropbox 目錄裡,
這樣我在公司與家裡的電腦上,都能藉由 Dropbox 同步,
而使用到相同的 gcloud:
tar xvf google-cloud-sdk-156.0.0-darwin-x86_64.tar.gz
mv google-cloud-sdk ~/Dropbox/Software/
接著執行 google-cloud-sdk/install.sh 開始安裝~
一開始會問是不是要幫忙改善 Google Cloud SDK,按下 y:
testuser@localhost ~ $ ~/Dropbox/Software/google-cloud-sdk/install.sh

Welcome to the Google Cloud SDK!

To help improve the quality of this product, we collect anonymized usage data
and anonymized stacktraces when crashes are encountered; additional information
is available at <https://cloud.google.com/sdk/usage-statistics>. You may choose
to opt out of this collection now (by choosing 'N' at the below prompt), or at
any time in the future by running the following command:

    gcloud config set disable_usage_reporting true

Do you want to help improve the Google Cloud SDK (Y/n)?  y
接著說會修改 ~/.bash_profile 檔案,把 gcloud 的路徑加進去:
Your current Cloud SDK version is: 156.0.0
The latest available version is: 156.0.0

┌─────────────────────────────────────────────────────────────────────────────────────────────────────────────┐
│                                                  Components                                                 │
├───────────────┬──────────────────────────────────────────────────────┬──────────────────────────┬───────────┤
│     Status    │                         Name                         │            ID            │    Size   │
├───────────────┼──────────────────────────────────────────────────────┼──────────────────────────┼───────────┤
│ Not Installed │ App Engine Go Extensions                             │ app-engine-go            │  96.7 MiB │
│ Not Installed │ Cloud Bigtable Command Line Tool                     │ cbt                      │   4.0 MiB │
│ Not Installed │ Cloud Bigtable Emulator                              │ bigtable                 │   3.3 MiB │
│ Not Installed │ Cloud Datalab Command Line Tool                      │ datalab                  │   < 1 MiB │
│ Not Installed │ Cloud Datastore Emulator                             │ cloud-datastore-emulator │  15.4 MiB │
│ Not Installed │ Cloud Datastore Emulator (Legacy)                    │ gcd-emulator             │  38.1 MiB │
│ Not Installed │ Cloud Pub/Sub Emulator                               │ pubsub-emulator          │  21.0 MiB │
│ Not Installed │ Emulator Reverse Proxy                               │ emulator-reverse-proxy   │  14.5 MiB │
│ Not Installed │ Google Container Registry's Docker credential helper │ docker-credential-gcr    │   2.3 MiB │
│ Not Installed │ gcloud Alpha Commands                                │ alpha                    │   < 1 MiB │
│ Not Installed │ gcloud Beta Commands                                 │ beta                     │   < 1 MiB │
│ Not Installed │ gcloud app Java Extensions                           │ app-engine-java          │ 132.2 MiB │
│ Not Installed │ gcloud app PHP Extensions (Mac OS X)                 │ app-engine-php-darwin    │  21.9 MiB │
│ Not Installed │ gcloud app Python Extensions                         │ app-engine-python        │   6.2 MiB │
│ Not Installed │ kubectl                                              │ kubectl                  │  14.8 MiB │
│ Installed     │ BigQuery Command Line Tool                           │ bq                       │   < 1 MiB │
│ Installed     │ Cloud SDK Core Libraries                             │ core                     │   6.1 MiB │
│ Installed     │ Cloud Storage Command Line Tool                      │ gsutil                   │   2.9 MiB │
│ Installed     │ Default set of gcloud commands                       │ gcloud                   │           │
└───────────────┴──────────────────────────────────────────────────────┴──────────────────────────┴───────────┘
To install or remove components at your current SDK version [156.0.0], run:
  $ gcloud components install COMPONENT_ID
  $ gcloud components remove COMPONENT_ID

To update your SDK installation to the latest version [156.0.0], run:
  $ gcloud components update


Modify profile to update your $PATH and enable shell command
completion?

Do you want to continue (Y/n)?  y
這樣子就安裝好 Google Cloud SDK 了,
而 gcloud 指令也已經可以使用了,就在 google-cloud-sdk/bin 目錄下,
不過要記得開一個新的 Terminal 視窗,才會用到新的 gcloud 路徑:
The Google Cloud SDK installer will now prompt you to update an rc
file to bring the Google Cloud CLIs into your environment.

Enter a path to an rc file to update, or leave blank to use
[/Users/testuser/.bash_profile]:
Backing up [/Users/testuser/.bash_profile] to [/Users/testuser/.bash_profile.backup].
[/Users/testuser/.bash_profile] has been updated.

==> Start a new shell for the changes to take effect.


For more information on how to get started, please visit:
  https://cloud.google.com/sdk/docs/quickstarts
2. 初始化設定 Google Cloud SDK
裝好 Google Cloud SDK 後,還要讓 SDK 綁定一個 Google 帳號,
gcloud 才知道它的動作要應用在哪個 Google 帳戶上。
執行 gcloud init 開始設定:
testuser@localhost ~ $ gcloud init
Welcome! This command will take you through the configuration of gcloud.

Your current configuration has been set to: [default]

You can skip diagnostics next time by using the following flag:
  gcloud init --skip-diagnostics

Network diagnostic detects and fixes local network connection issues.
Checking network connection...done.
Reachability Check passed.
Network diagnostic (1/1 checks) passed.

You must log in to continue. Would you like to log in (Y/n)?  y
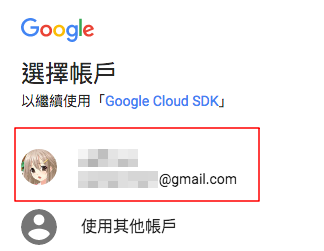
按下 y 後,瀏覽器會開啟 Google 登入的畫面,選擇要使用的 Google 帳戶:
允許 Google Cloud SDK 來存取我們在 Google Cloud Platform 上的資源:
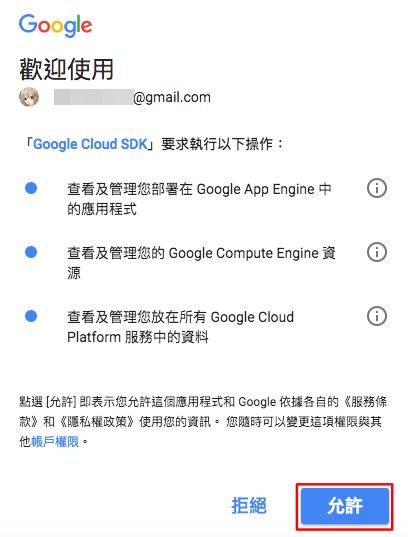
這樣子 Google Cloud SDK 就已經和我們的 Google 帳號綁定了~
接著選擇預設使用的專案:
You are logged in as: [testuser@gmail.com].

Pick cloud project to use:
 [1] ephrain-blog
 [2] Create a new project
Please enter numeric choice or text value (must exactly match list
item):  1
專案選好之後,還可以修改一下 Google Compute Engine 的設定,
按下 y 來設定:
Your current project has been set to: [ephrain-blog].

Do you want to configure Google Compute Engine
(https://cloud.google.com/compute) settings (Y/n)?  y
主要可以設定的也就是這個 VM 的實體所在地,
之前有提過 asia-east1-a 是中華電信的機房,而且有較多的 CPU 核心,
因此我還是設定在這個區域上:
Which Google Compute Engine zone would you like to use as project
default?
If you do not specify a zone via a command line flag while working
with Compute Engine resources, the default is assumed.
 [1] asia-east1-b
 [2] asia-east1-a
 [3] asia-east1-c
 [4] asia-northeast1-a
 [5] asia-northeast1-c
 [6] asia-northeast1-b
 [7] asia-southeast1-b
 [8] asia-southeast1-a
 [9] europe-west1-c
 [10] europe-west1-d
 [11] europe-west1-b
 [12] us-central1-f
 [13] us-central1-a
 [14] us-central1-b
 [15] us-central1-c
 [16] us-east1-d
 [17] us-east1-b
 [18] us-east1-c
 [19] us-east4-b
 [20] us-east4-c
 [21] us-east4-a
 [22] us-west1-a
 [23] us-west1-b
 [24] Do not set default zone
Please enter numeric choice or text value (must exactly match list
item):  2
這樣子就初始化完成了:
Your project default Compute Engine zone has been set to [asia-east1-a].
You can change it by running [gcloud config set compute/zone NAME].

Your project default Compute Engine region has been set to [asia-east1].
You can change it by running [gcloud config set compute/region NAME].

Your Google Cloud SDK is configured and ready to use!

* Commands that require authentication will use testuser@gmail.com by default
* Commands will reference project `ephrain-blog` by default
* Compute Engine commands will use region `asia-east1` by default
* Compute Engine commands will use zone `asia-east1-a` by default

Run `gcloud help config` to learn how to change individual settings

This gcloud configuration is called [default]. You can create additional configurations if you work with multiple accounts and/or projects.
Run `gcloud topic configurations` to learn more.

Some things to try next:

* Run `gcloud --help` to see the Cloud Platform services you can interact with. And run `gcloud help COMMAND` to get help on any gcloud command.
* Run `gcloud topic -h` to learn about advanced features of the SDK like arg files and output formatting
3. 使用 gcloud 開 SSH 連線至 VM 裡面
可以參考這篇文件:
Google Cloud Platform > Compute Engine > Connecting to Linux Instances
首先,用 gcloud compute instances list,將我們擁有的 VM 都列出來~
目前我是只有 wordpress-ephrain-vm 這個 VM:
testuser@localhost ~ $ gcloud compute instances list

NAME                  ZONE          MACHINE_TYPE  PREEMPTIBLE  INTERNAL_IP  EXTERNAL_IP     STATUS
wordpress-ephrain-vm  asia-east1-a  f1-micro                   10.140.0.2   35.185.170.101  RUNNING
得知 VM 的名稱後,就可以用 gcloud compute ssh 指令,
來 SSH 連線到指定的 VM 了~
因為我這是第一次使用 gcloud 連線,
因此 gcloud 會幫忙建出 SSH 的 public/private key:
testuser@localhost ~ $ gcloud compute ssh wordpress-ephrain-vm

WARNING: The public SSH key file for gcloud does not exist.
WARNING: The private SSH key file for gcloud does not exist.
WARNING: You do not have an SSH key for gcloud.
WARNING: SSH keygen will be executed to generate a key.
Generating public/private rsa key pair.
Enter passphrase (empty for no passphrase):
Enter same passphrase again:
Your identification has been saved in /Users/testuser/.ssh/google_compute_engine.
Your public key has been saved in /Users/testuser/.ssh/google_compute_engine.pub.
Updating project ssh metadata.../Updated [https://www.googleapis.com/compute/v1/projects/ephrain-blog].
Updating project ssh metadata...done.
Waiting for SSH key to propagate.
gcloud 會在 ~/.ssh 目錄下,產生出名叫 google_compute_engine 的公私鑰,
接著就直接 SSH 連線到 VM 中了:
The programs included with the Debian GNU/Linux system are free software;
the exact distribution terms for each program are described in the
individual files in /usr/share/doc/*/copyright.

Debian GNU/Linux comes with ABSOLUTELY NO WARRANTY, to the extent
permitted by applicable law.
       ___ _ _                   _
      | _ |_) |_ _ _  __ _ _ __ (_)
      | _  |  _| ' / _` | '  | |
      |___/_|__|_|_|__,_|_|_|_|_|

  *** Welcome to the Bitnami WordPress 4.7.3-0 ***
  *** Documentation:  https://docs.bitnami.com/google/apps/wordpress/ ***
  ***                 https://docs.bitnami.com/google/ ***
  *** Bitnami Forums: https://community.bitnami.com/ ***
testuser@wordpress-ephrain-vm:~$
有了 gcloud 之後,就不用再打開瀏覽器,才能做 SSH 連線啦~